


How to install Ubuntu Linux on Windows 10 using VirtualBox
In this tutorial, we shall walk through the steps needed to install the Ubuntu flavor of Linux OS on a Windows 10 (64-bit) machine. In order words, when we are done we shall have Ubuntu (the guest operating system) running as a virtual machine on Windows (the host operating system). So just to be explicit, the following items are needed to complete this tutorial: VirtualBox installer, the latest LTS version of Ubuntu (as an ISO image file), a 64-bit Windows machine with at least 8GB of RAM.
What is a VirtualBox (VBox for short)? Oracle VM VirtualBox is a free and open-source virtualization platform by Oracle which may be installed on Windows, macOS, Linux, Solaris and OpenSolaris; and according to Wikipedia it supports the creation and management of guest virtual machines on which other OS (known as guest operating systems) apart from the host OS can run. For some of these guest operating systems, a “Guest Additions” package of device drivers and system applications is available, which typically improves performance, especially that of graphics.
Phase 1: Install VirtualBox
Skip this section if you already have VirtualBox installed on your PC.
- If you do not have the VirtualBox installer for Windows, go to virtualbox.org to download the latest installer for windows hosts. For the purpose of this tutorial, we shall be using VirtualBox 6.0.10
NOTE: Also download VirtualBox Extension Pack for the version of the VirtualBox installer you downloaded e.g. Oracle_VM_VirtualBox_Extension_Pack-6.0.10
- Run the installer and follow the prompts to complete the installation by clicking the NEXT button on the three screens depicted in the image below.
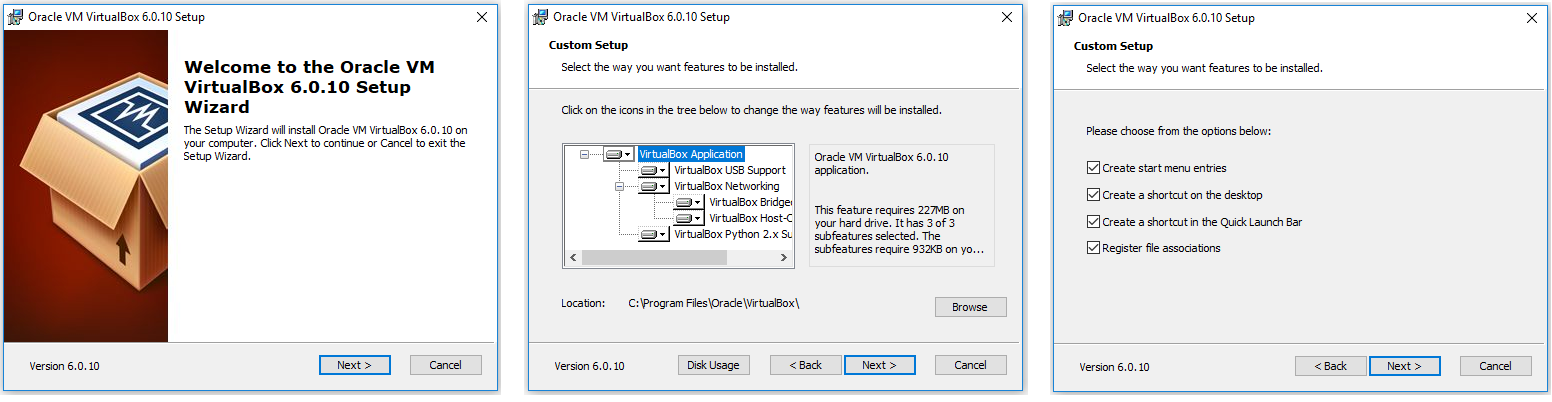
- At the fourth screen of the installation wizard,.you will get a warning that your network connection will be reset and that you shall temporarily be disconnected from the network. Ensure you are not in the middle of a large download that cannot be resumed, and click the YES button.
- On the next screen, click on the INSTALL button. If you get the prompt to allow the installer make changes to your device, select YES.
- When the installation wizard is done, uncheck the “Start Oracle VM VirtualBox 6.0.10 after installation” checkbox, and then click on the FINISH button.
Phase 2: Create an Ubuntu Virtual Machine
For the purpose of this tutorial we shall be installing the latest LTS (long-term support) version of Ubuntu, that is, version 18.04.3 as at August 2019..
- If you do not have the ISO file for Ubuntu, go to www.ubuntu.com/download/desktop and download the latest LTS release. Note that it may take a while because it is about 1.9GB.
- From your Start (or Windows) menu or using the Oracle VM VirtualBox icon on your desktop, launch VirtualBox. Then click on New.
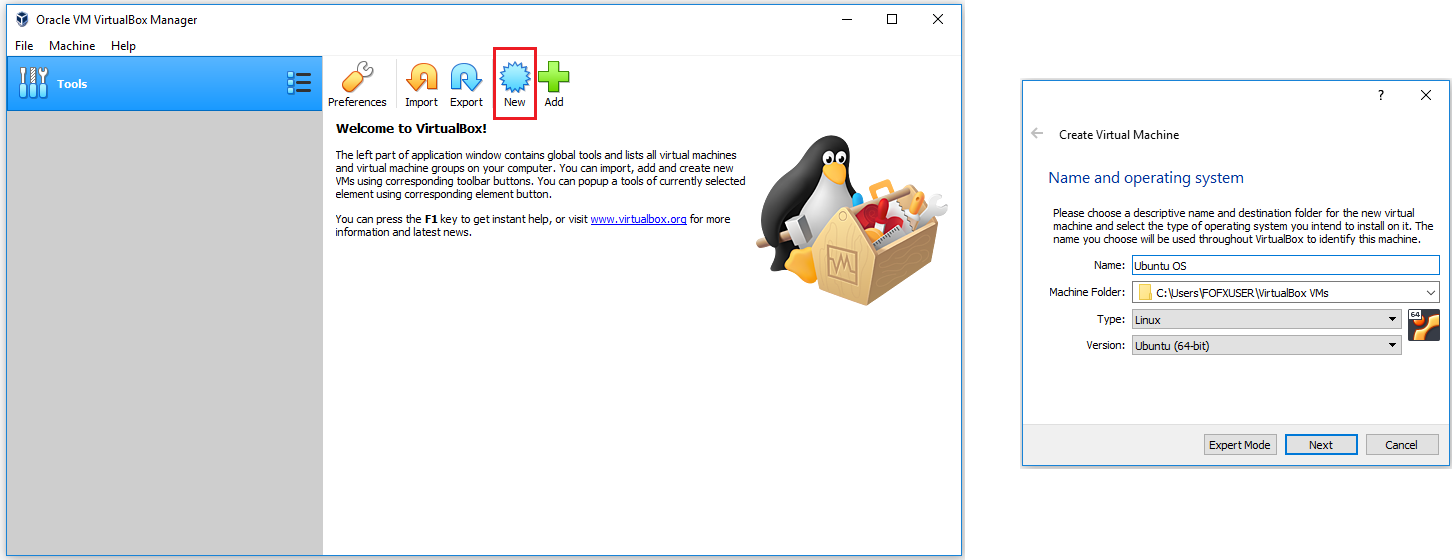
- On the “Create Virtual Machine” dialog box, choose a Name for the virtual machine e.g. Ubuntu OS. VitualBox will try to predict the Type and Version based on the name you entered. Otherwise, select the following:
-
- Type =
Linux - Version =
Ubuntu (64-bit)
- Type =
- Next, you need to specify the amount of RAM memory to allocate to the virtual machine. Ubuntu system requirements advise we need at least 2GB however, it is recommended you allocate more if your host machine can handle it. The higher you can set this memory size without severely impacting your host machine, the better the performance of the guest machine. If you are not sure, use 2GB
For the purpose of this demonstration, we shall set the memory size to3072MB i.e.3 x 1024which equals 3GB and click Next.
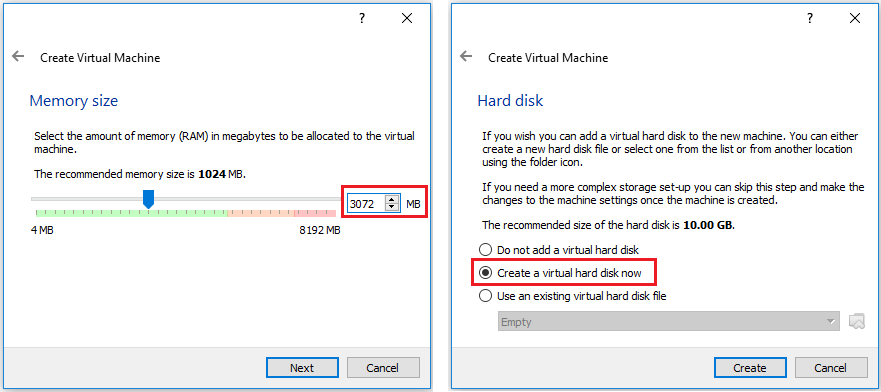
- On the Hard disk screen, select Create a virtual hard disk now and click Create.
- On the Hard disk file type screen, accept the default option VDI (VirtualBox Disk Image) and click Next.
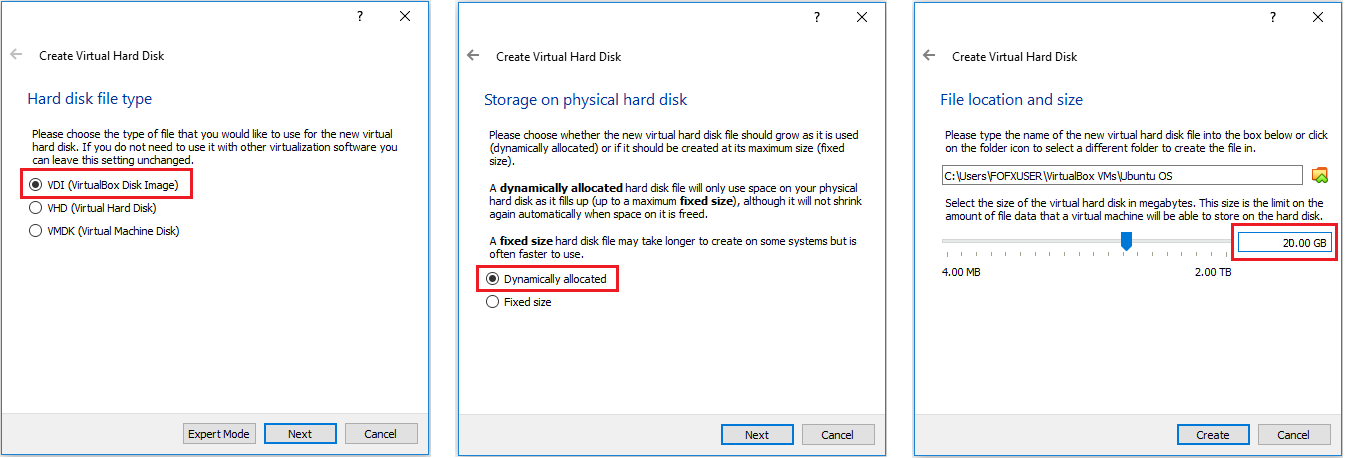
- The next screen is for Storage on physical hard disk. The two options are well expalined but we shall go for the default, which is, Dynamically allocated so that VirtualBox will allocate space for the hard disk as it contains more and more files; this storage space is only limited by the hard disk size we shall specify in the next step. Click Next.
- For the File location and storage screen, enter a name (say, Ubuntu OS) and a size (20GB) for the hard disk. The Ubuntu system requirements recommend 25GB though. Click Create.
Phase 3: Configure Settings for the Virtual Machine
Back to the main VirtualBox window, we shall now configure the settings for the virtual machine we have just created.
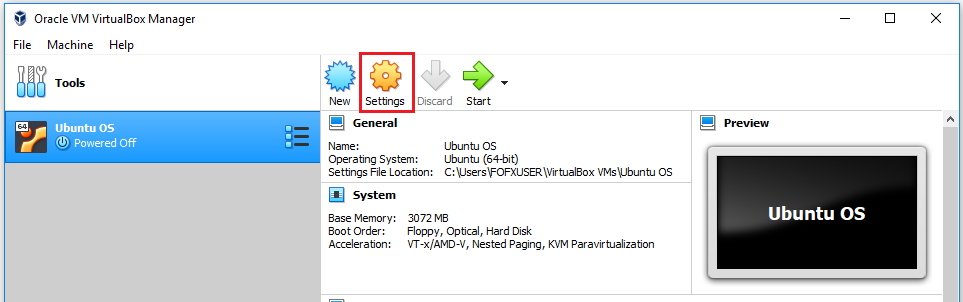
- On the left side of the window, select the virtual machine (i.e. Ubuntu OS) then click on the Settings button.
- On the left pane of the Settings dialog, select General then click on the Advanced tab then choose Bidirectional for both the Shared Clipboard dropdown and the Drag ‘n’ Drop dropdown.
- Next, on the left pane of the Settings dialog, select Storage, then in the right pane under Controller: IDE select the CD icon with the word Empty beside it.
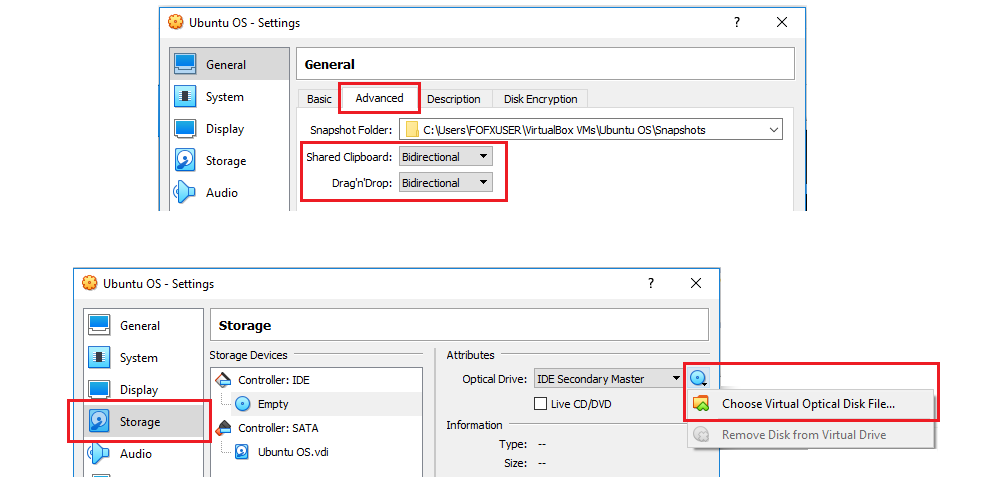
- Then still on the right pane, to the extreme right under Attributes, click the CD icon and from the menu that appears, select Choose Virtual Optical Disk File…
- Browse to the downloaded file
ubuntu-18.04.3-desktop-amd64.iso, select it, and click Open.
- Click OK to close the Settings dialog window. The virtual machine is now ready to start.
Phase 4: Install Ubuntu on the Virtual Machine
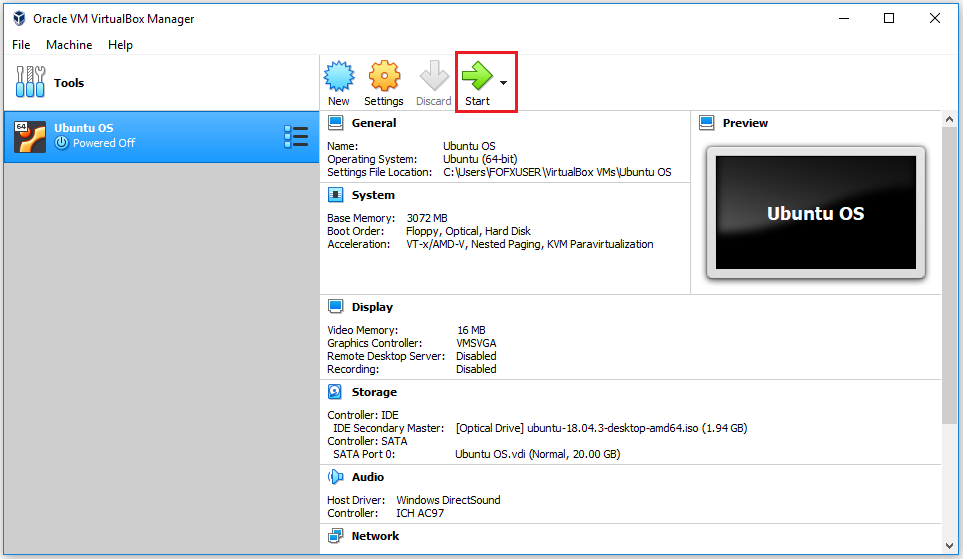
Back to the main VirtualBox window, the VM for Ubuntu OS should be showing as Powered Off, and the optical drive (IDE Secondary Master) pointing to the Ubuntu ISO file.
- With the Ubuntu OS virtual machine selected, click Start.
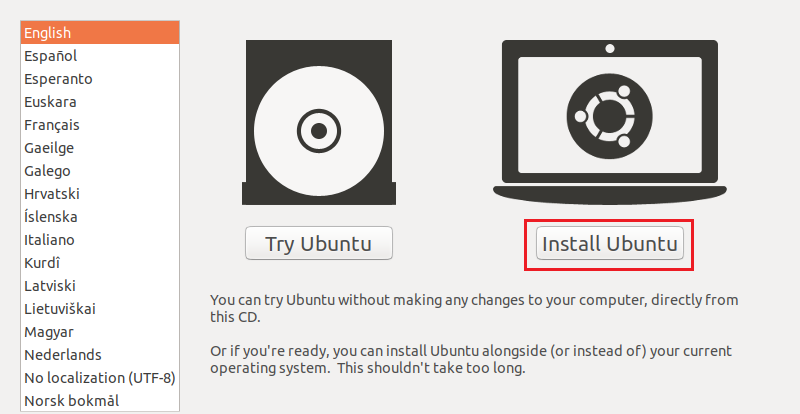
- VirtualBox launches a new window with the VM and boots from the ISO file. After the few minutes it takes Ubuntu to load, you should see the screen below. Click Install Ubuntu.
- Select your keyboard layout (or accept the defaults) and click Continue.
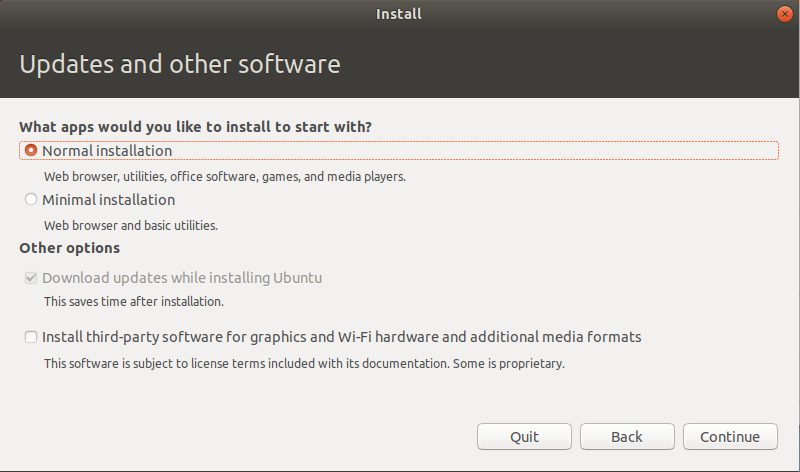
- Use the default options Normal installation then with the Download updates while installing Ubuntu checkbox checked, click Continue.
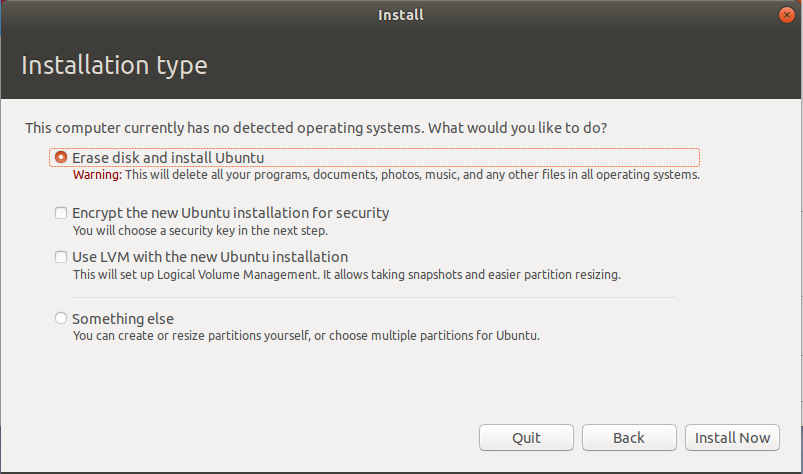
- Accept the default option Erase disk and install Ubuntu, then click Install Now
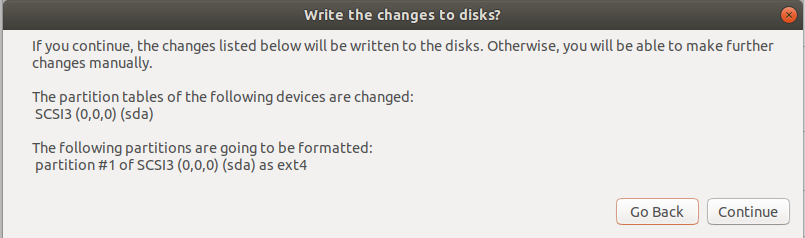
- You will be prompted with a warning that the changes will be written to disk. Click Continue.
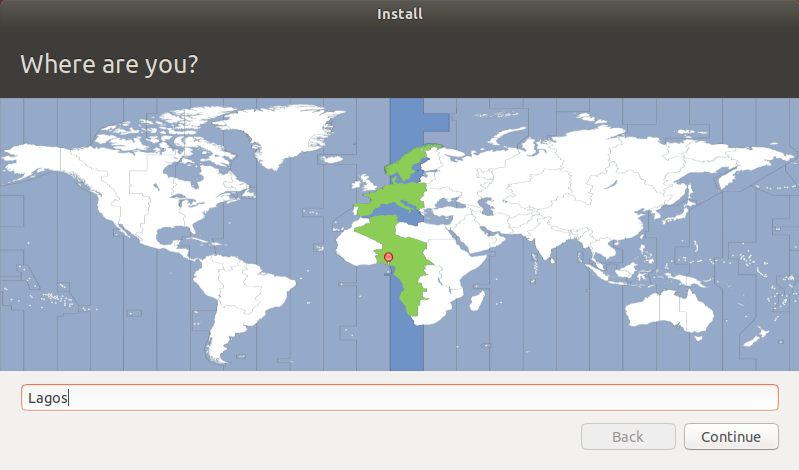
- Select your timezone (e.g. Lagos) and click Continue.
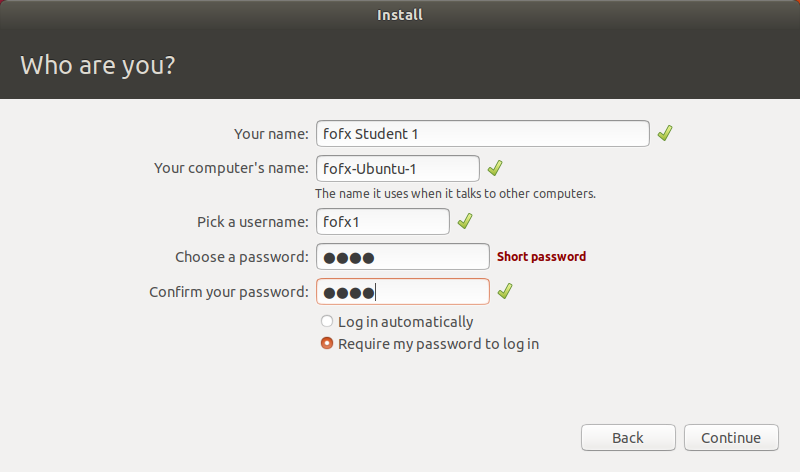
- Enter a your name, computer name, username and password, then click Continue.
- The Ubuntu installation will take several minutes to complete, so you will have to wait a bit.

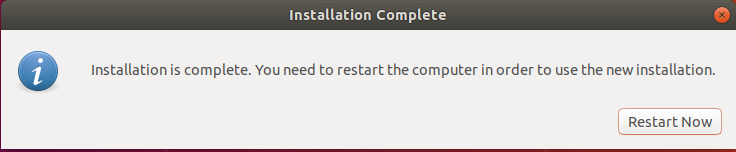
- After the installation is finished you will be prompted to restart the VM. Click Restart Now.
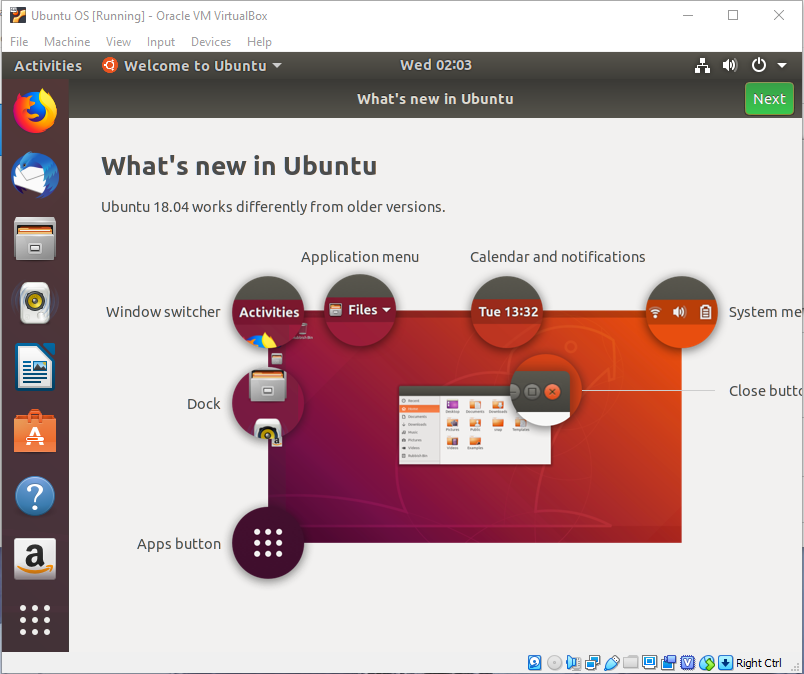
- When the VM reboots you will see the message depicted by the image below:
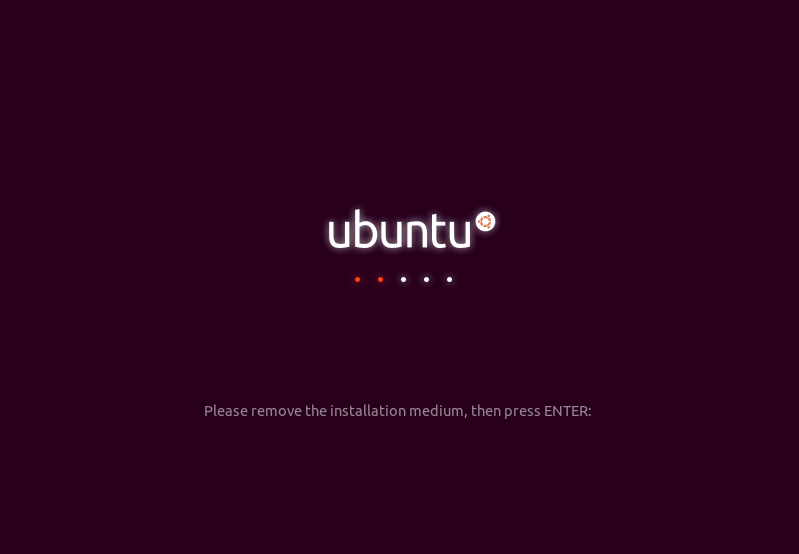
From the menu select Machine > Settings.
On the right side, select Storage to show the screen where we previously selected the ISO file. If the Ubuntu ISO file is still there, remove it. Otherwise, close the Settings window, then in the VM click Enter to finish booting.
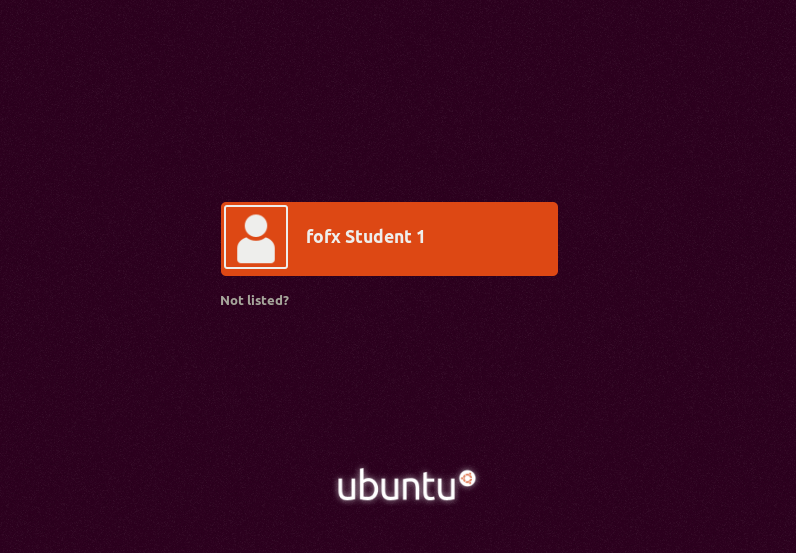
- If all went well the VM should boot to the Ubuntu login screen. Select your user and enter the password to login.
Phase 5: Check for Updates and Install them
Now that we have Ubuntu OS installed on the Ubuntu VM, we should check for updates and if any, install them.
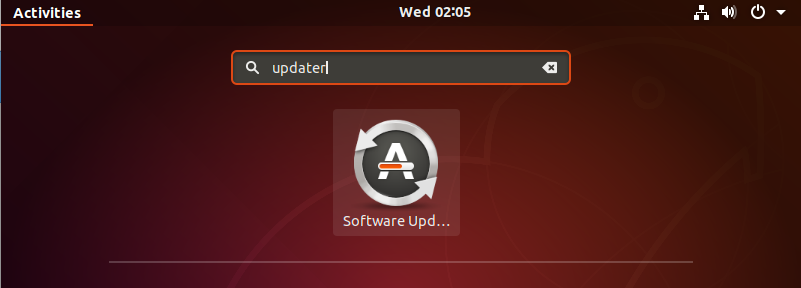
- With your Ubuntu VM running, observe the vertical taskbar shown on the left of the screen, the last icon is a square pattern made up of nine (9) dots; this is called the Apps Button. Click on it.
- Then in the Search field that appears, type updater and hit Enter.
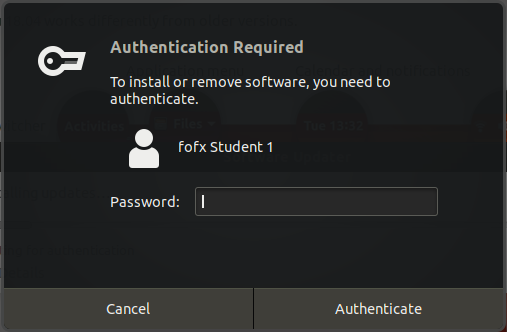
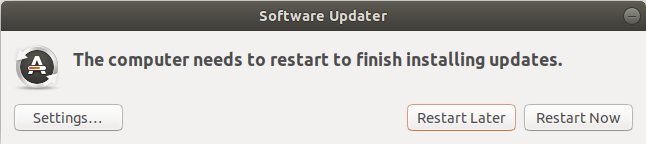
- When the Software Updater app is shown, double-click on it to run it. If there are any updates you should see the dialog shown below.

- Click the Install Now button and then enter your password if prompted for it.
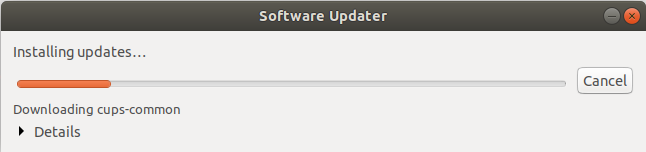
- You will have to wait a bit for the updates to install.
- When the updates are done installing you will be prompted to restart the VM. Click Restart Now.
Phase 6: Modify Display Settings
By default the VM will only have 16 MB video memory. Considering we shall be installing VirtualBox Guest Additions in the next step, 16 MB will not be enough. If your host system can handle it, 128 MB is a good recommendation else you can opt for 32, 64, or 96 MB.
- Ensure the Ubuntu VM is not running. This implies that you have to shut down if it is. Use Alt+Ctrl+T to open a Terminal window, then type
sudo poweroff
to initiate shutdown, and if prompted for your password, enter it.
- Then on the Close Virtual Machine dialog, select the Power off the machine option.

- On the VirtualBox window, select the Ubuntu VM on the left pane and then click on the Settings button.
- Then on the left pane of the Settings dialog, click Display. Then input
32 MBfor Video Memory.
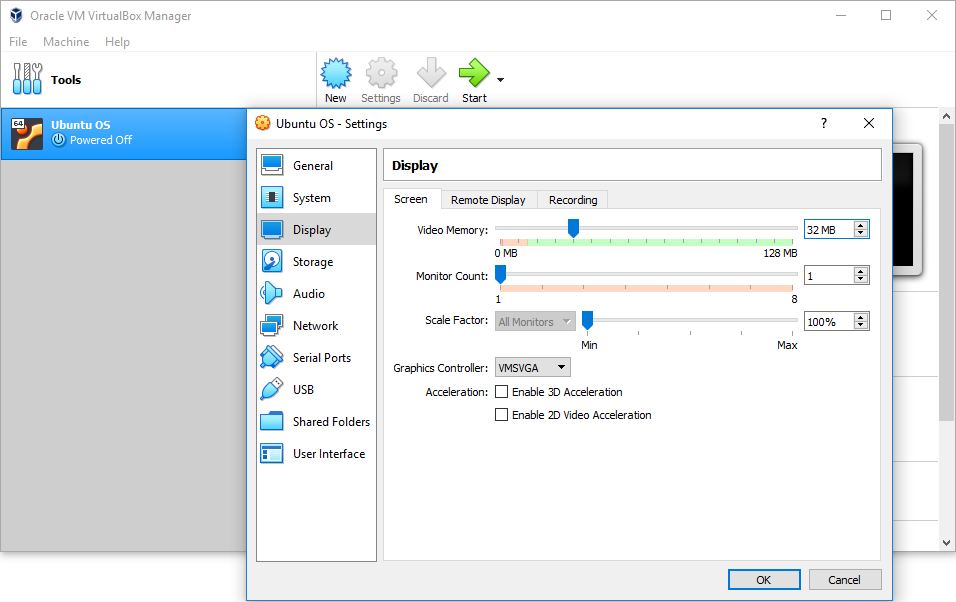
- Click on OK to save the change.
- Next is to install the Oracle VM VirtualBox Extension Pack we downloaded earlier on with the VirtualBox installer.
- Then on the VM window, click on the Start button to boot the Ubuntu VM.
Phase 7: Install Guest Additions
Notice that when the VM boots up that on maximising the VM window, the display of the Ubuntu desktop does not scale to fill the screen. To correct this we have to install VirtualBox Guest Additions on the Ubuntu VM we have created.
- Before we proceed we need to ensure that our Ubuntu installation is up to date. So use Alt+Ctrl+T to open a terminal and then enter the commands below:
sudo apt-get update
sudo apt-get upgrade
- Once the updates are finished, restart Ubuntu using the command below. You may need to enter your password if prompted for it.
sudo reboot
- VirtualBox Guest Additions require some additional packages to be installed in Ubuntu. If you try to install Guest Additions without these additional packages you will get an error message that looks like this:
This system is currently not set up to build kernel modules. Please install the gcc make perl packages from your distribution
To fix this, open a new terminal and enter the command below to install the missing packages:
sudo apt install linux-headers-$(uname -r) build-essential dkms
- Once the installation is complete, restart Ubuntu again..
- Once Ubuntu is restarted and you are logged in, from the VirtualBox menus, select Devices > Insert Guest Additions CD image… .
- The software will automatically start. In the prompt, click Run on the dialog that appears.
- Then enter your password and click Authenticate.
- A new terminal window will be opened and the installation will proceed.
- Once the install is complete, hit Enter to close the terminal window.
- Restart Ubuntu.
Hurray!!! You have successfully installed an Ubuntu Virtual Machine on your (host) PC running on Windows OS.